SongKong Installation for QNAP
SongKong is available for all QNAP models that support QTS App Center (v4.2 or above) and the Container Station package, this is currently all recent QNAP models with an Intel CPU and also any QNAP with an Arm CPU as long as they have at least 1GB of memory.
SongKong is available for all QNAP models that support QTS App Center (v4.2 or above) and the Container Station package, this is currently all recent QNAP models with an Intel CPU and also any QNAP with an Arm CPU as long as they have at least 1GB of memory.
The following models are supported, full details from QNAP Container Station Page
- Intel - HS-251+, TS-x51, TS-x51+, TS-x51A, TS-x53, TS-x53A, TS-x53B, TBS-453A, TS/TVS-x63, TVS-x70, TVS-x71, TS/SS-x79, TS/TVS-x80, TVS-x82 series
- Arm - TS-x28, TS-x31P, TS-x31X, TS-x31+ series and TS-1635 with a minimum of 1GB RAM
The least expensive QNAP to support SongKong is the TS-128A
Container Station allows you to use Docker, Docker is a way to run an application on all variants of linux in a standard way, without having to do different installations for different linux variants. It is especially useful for NAS machines since each NAS manufacturer has its own method for installing additional software.
If you do not already have the Container Station package installed then install as follows, if you already have installed then you can skip this section
-
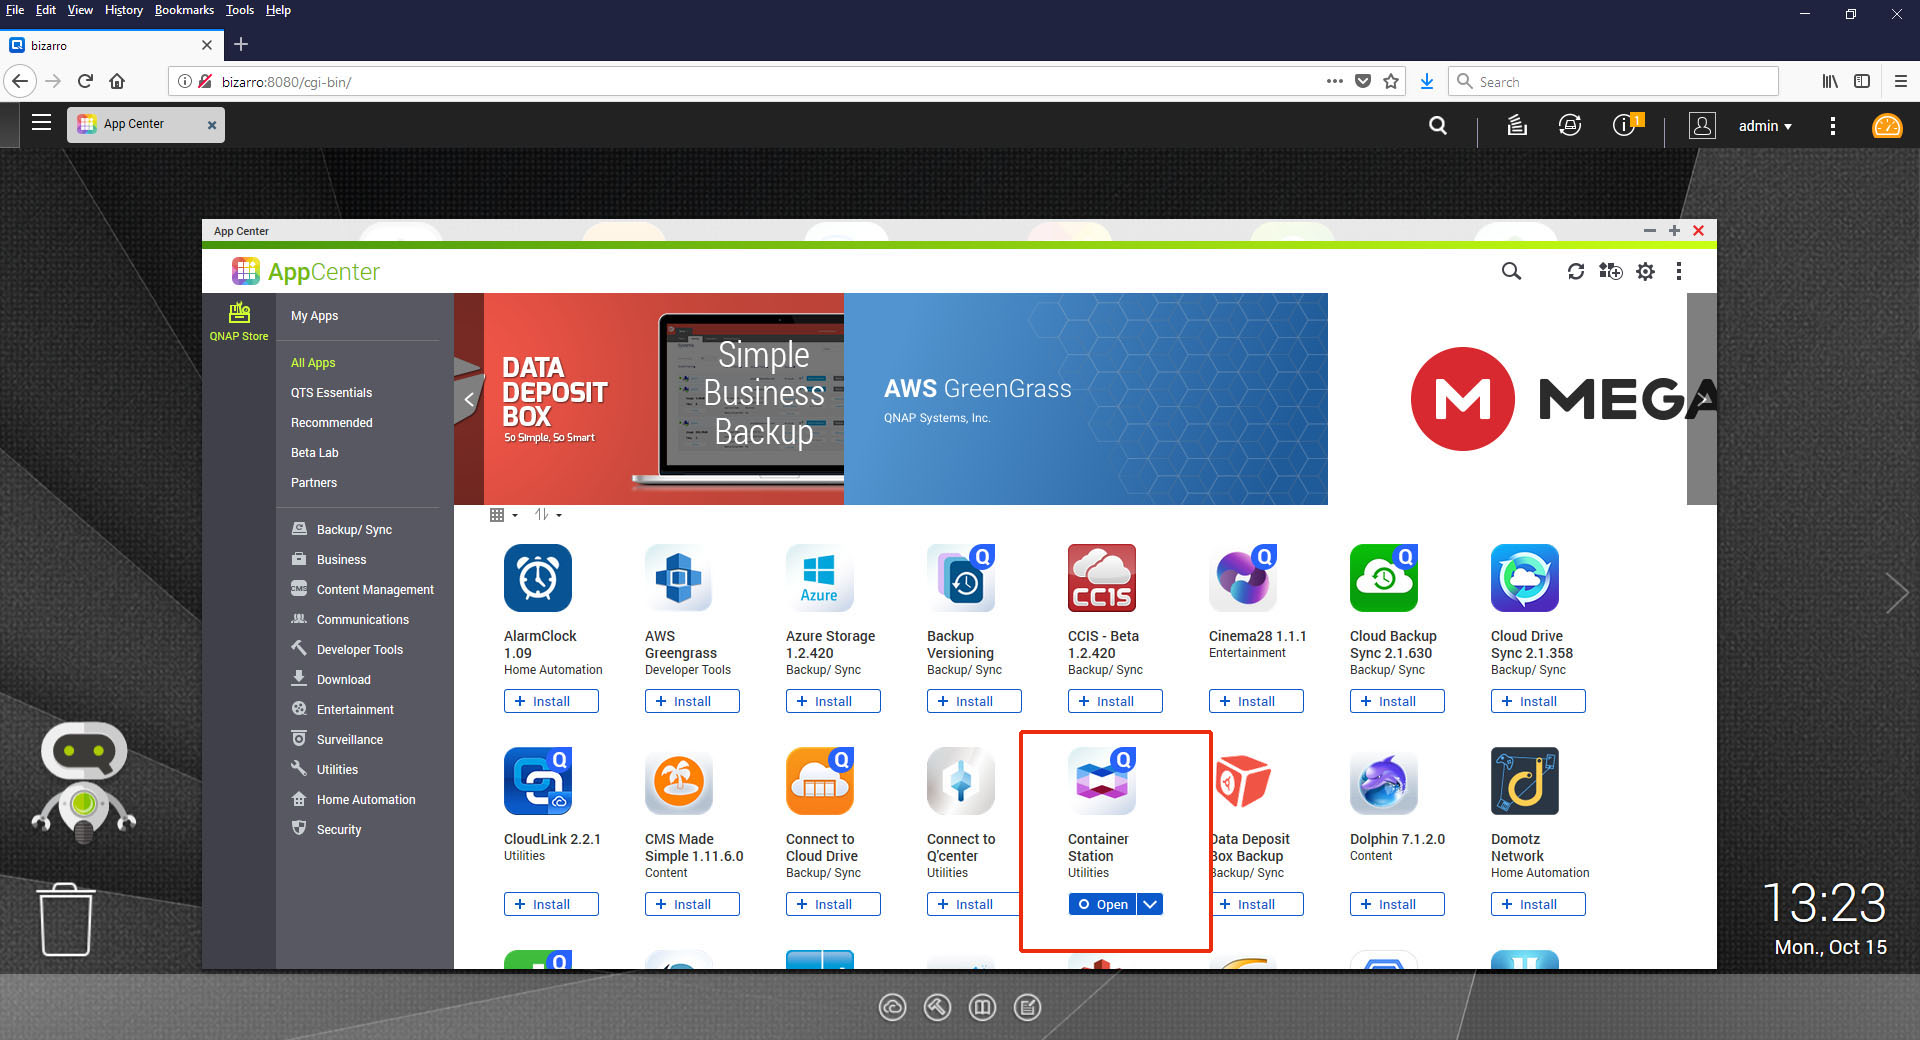
Open the App Centre and select All Apps tab
-
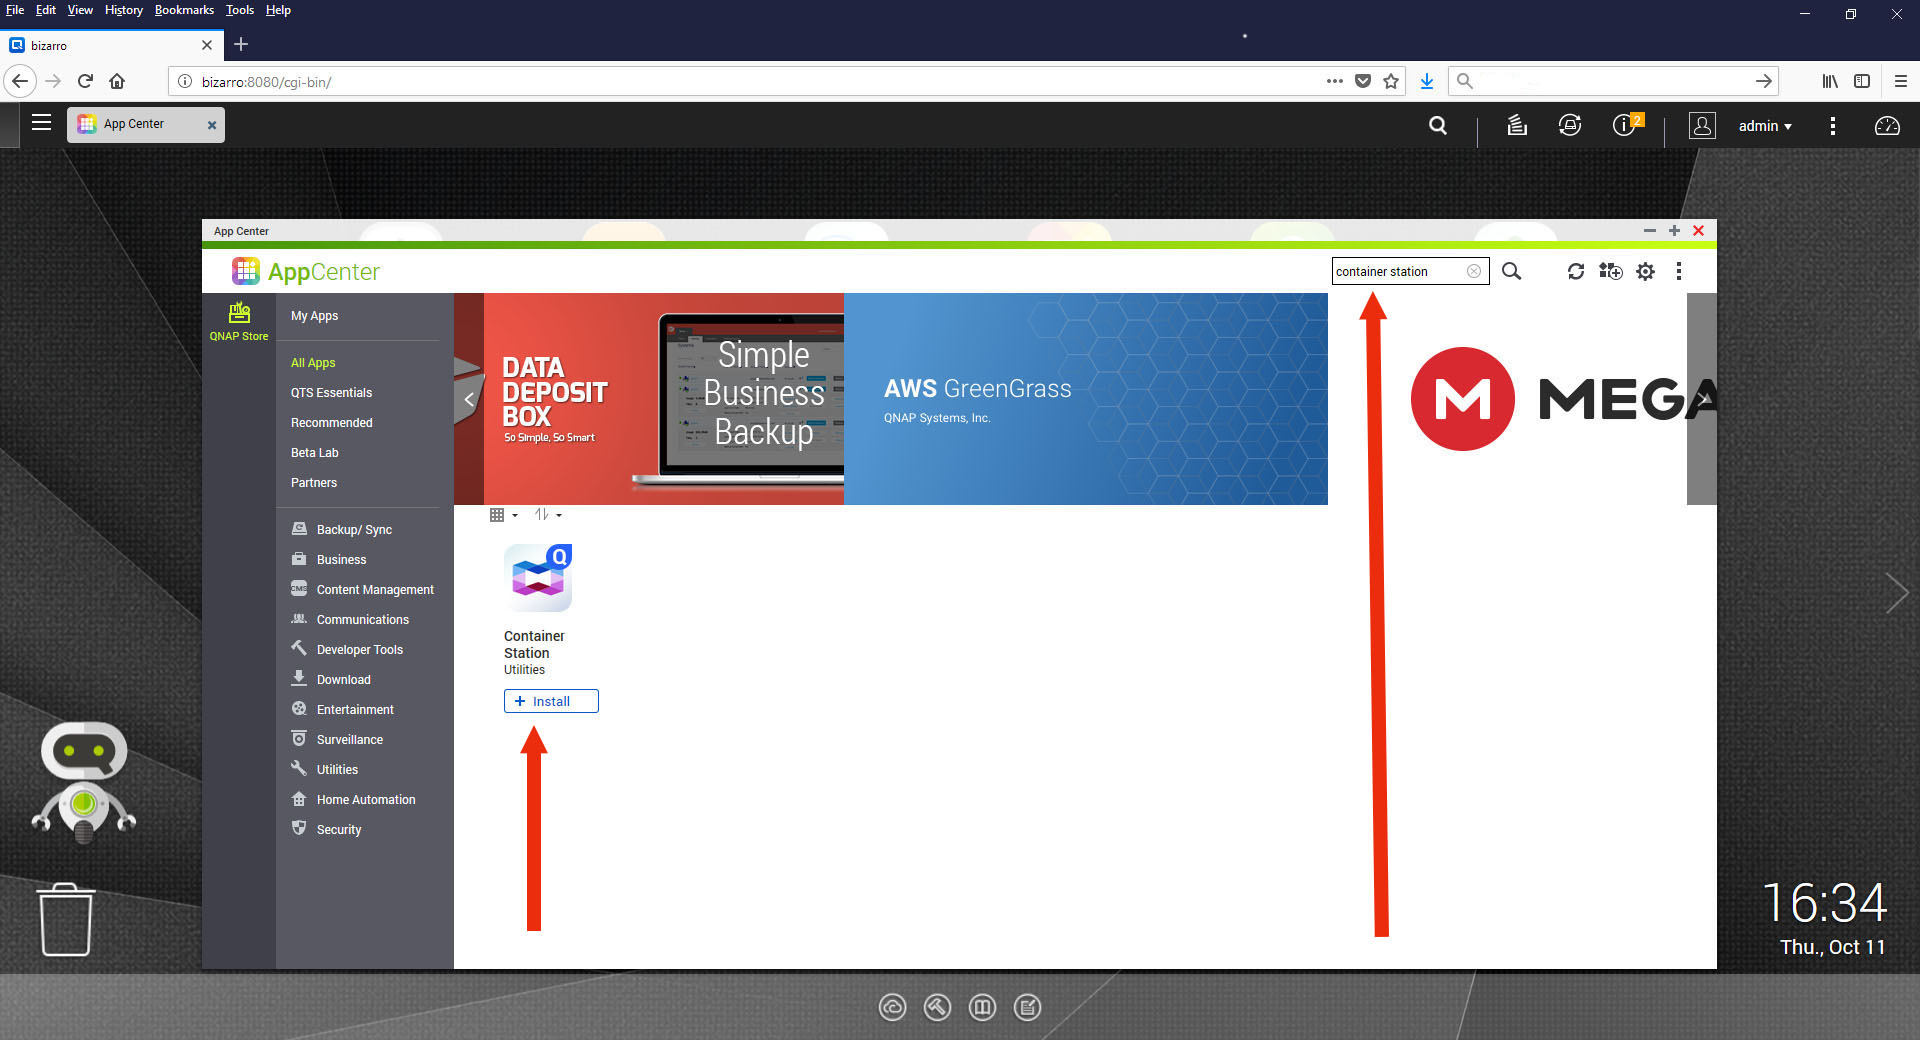
Then search for Container Station in the Search bar, and select the Install button
-
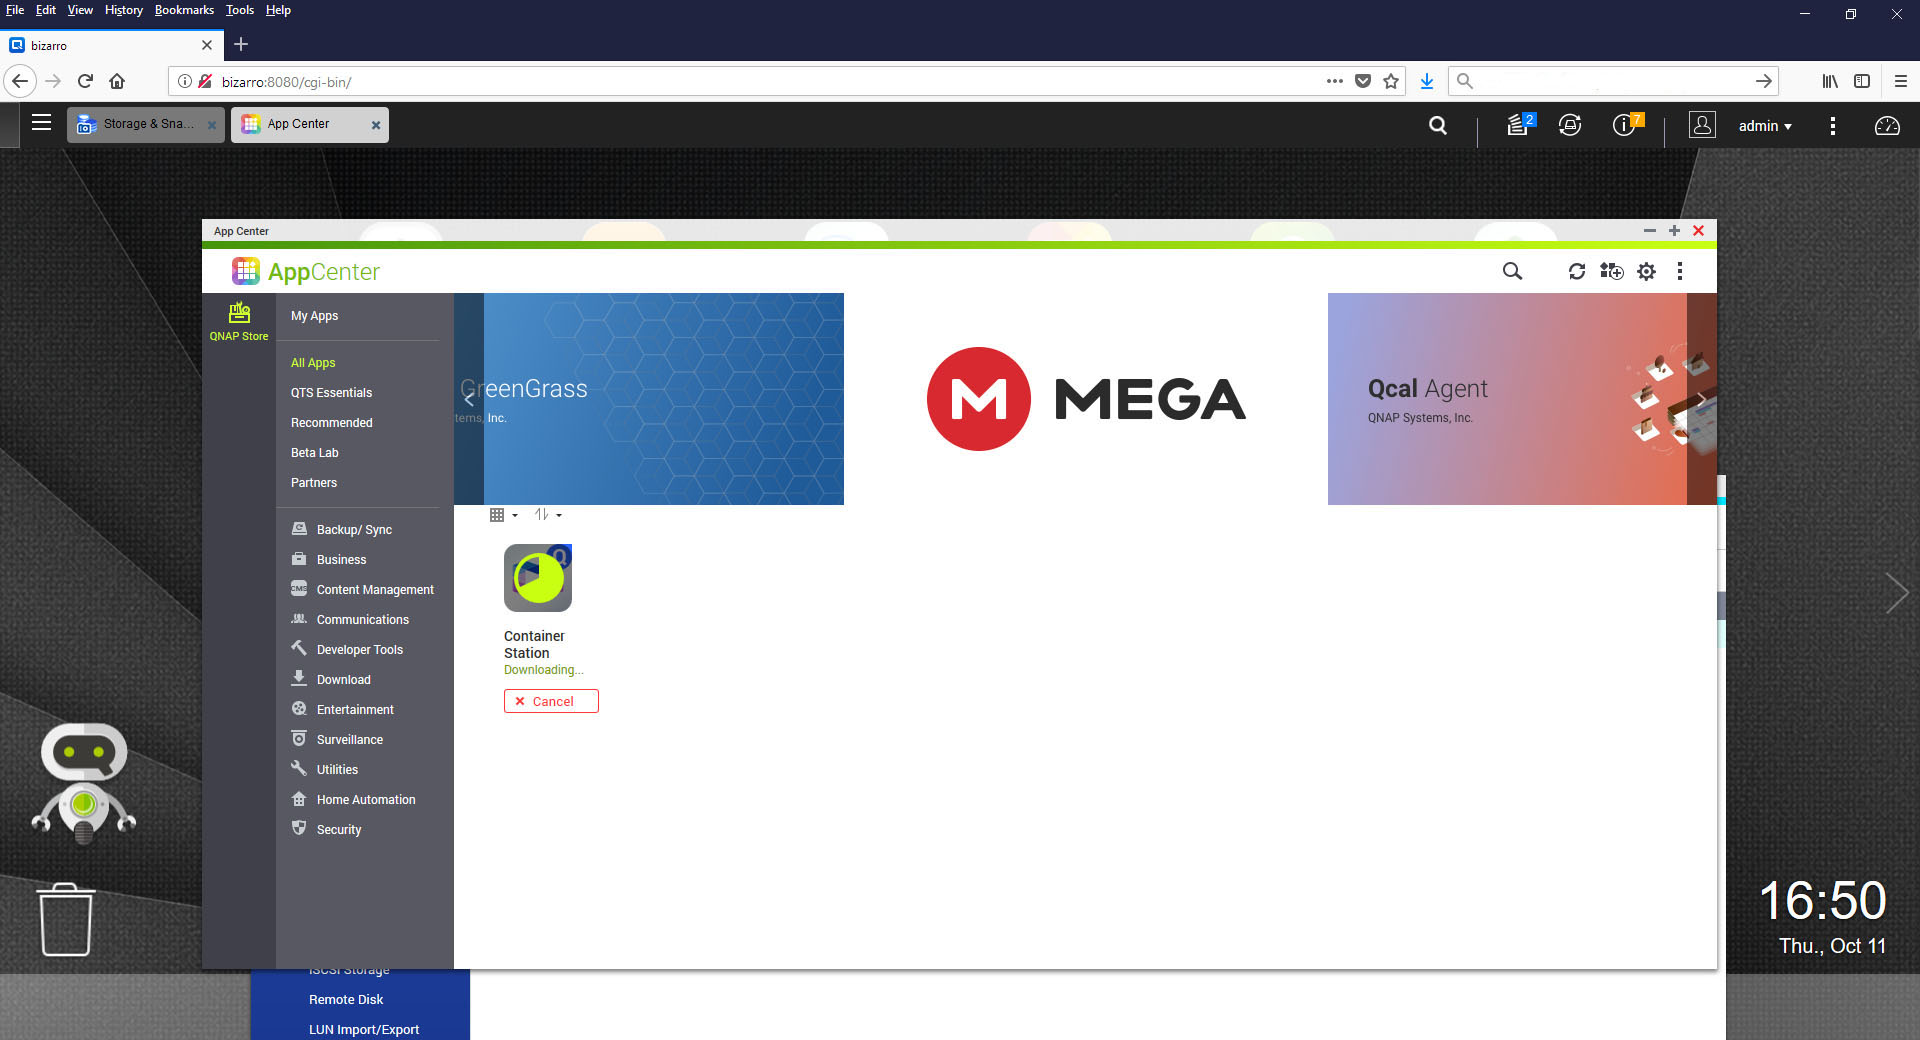
Then wait for install to complete
Install SongKong
-
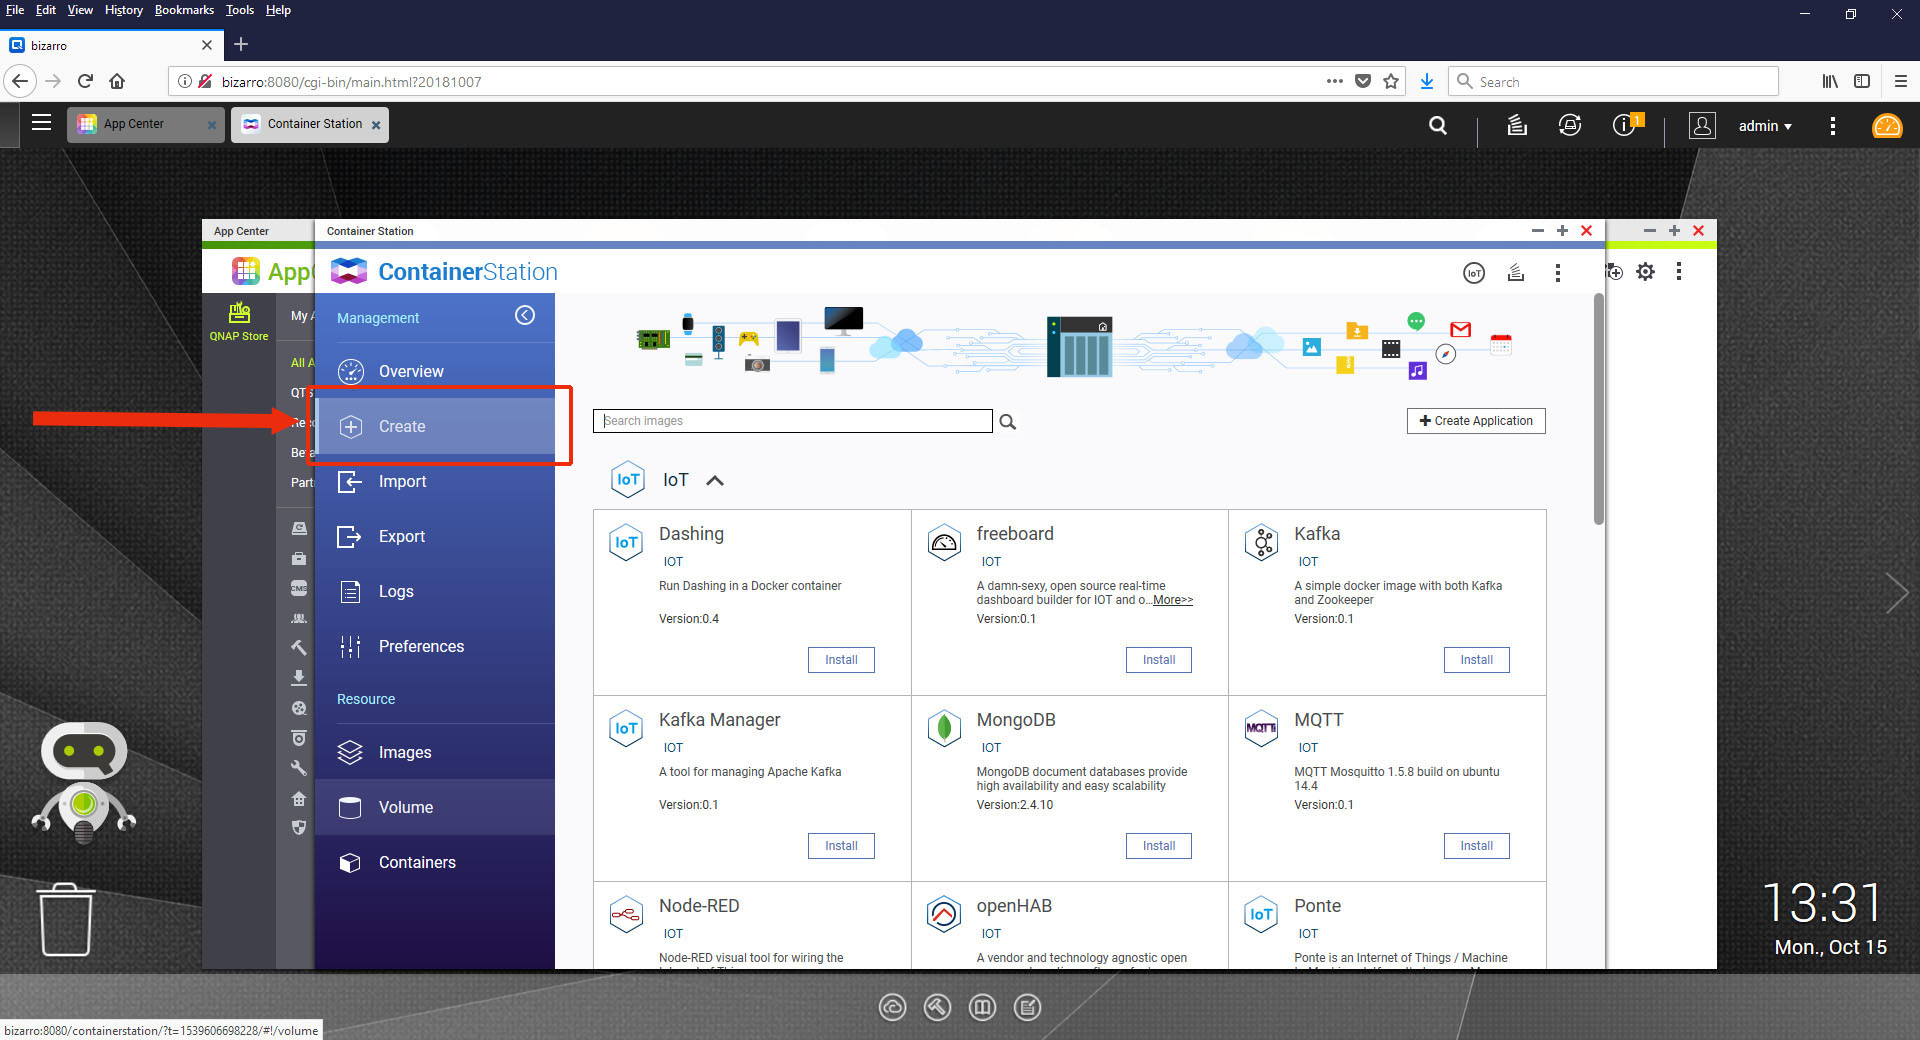
Start Container Station and then select Create from the left hand side
-
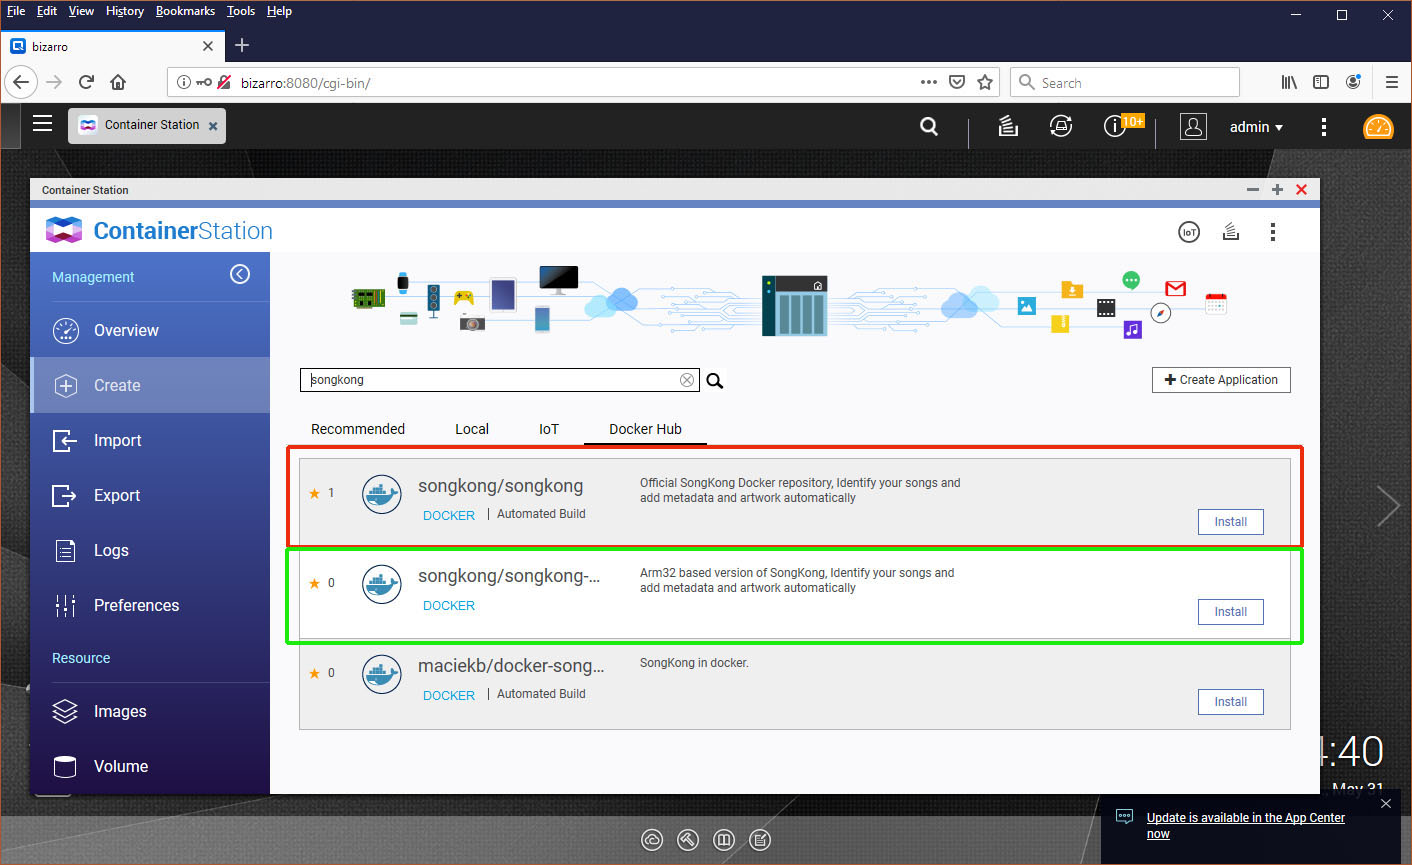
Now search for songkong in the search bar, this will return multiple images, if you have an Intel based QNAP select the one called songkong/songkong (red outline below), if you have an Arm based QNAP select the one called songkong/songkong-arm32 (green outline below) , now select Install.
-
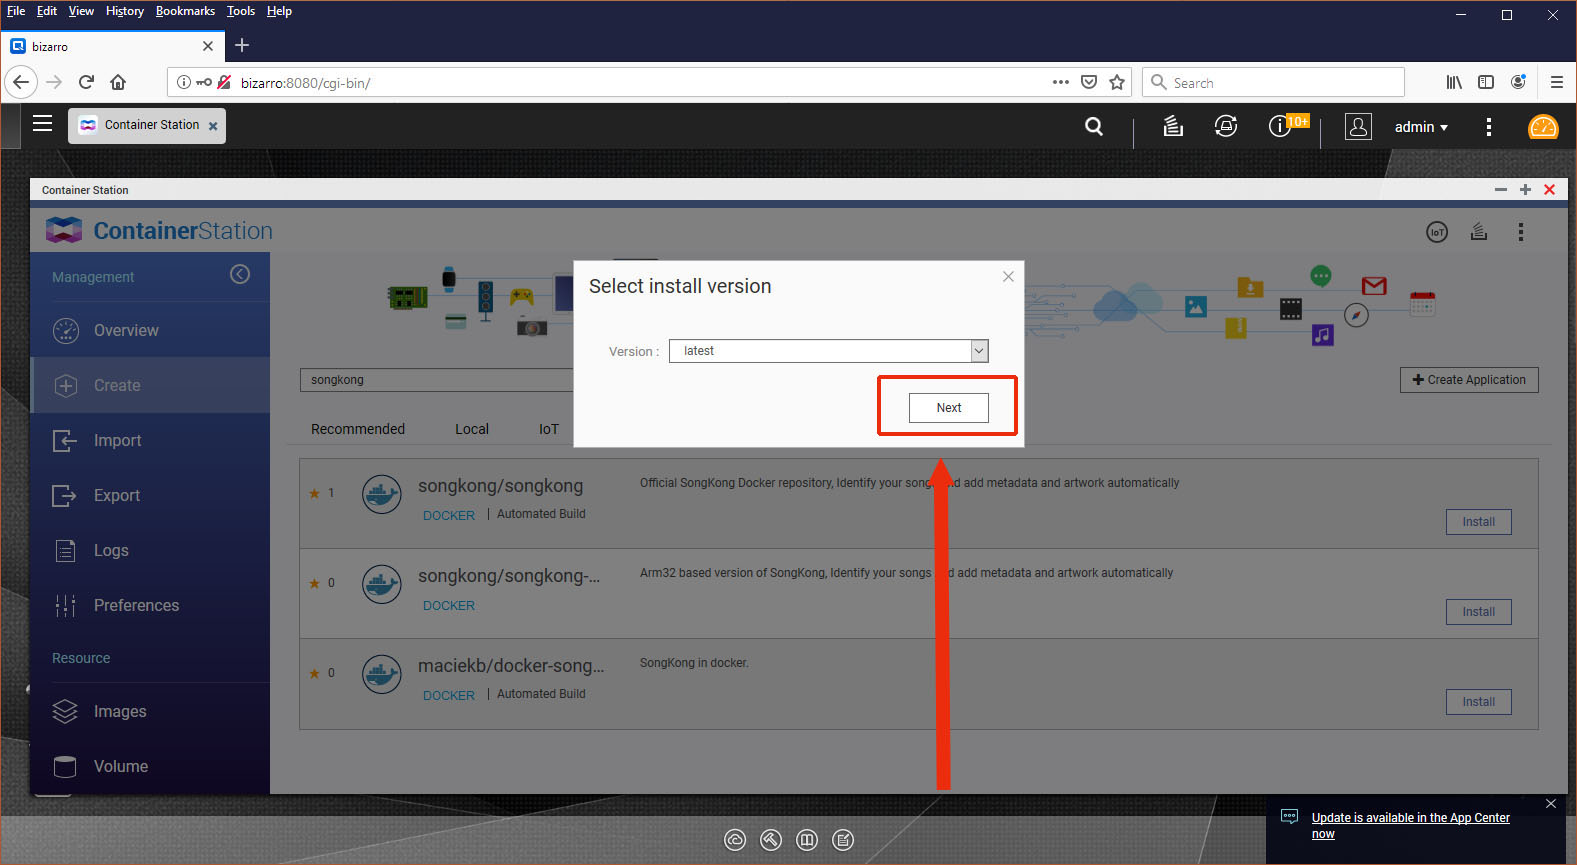
Version should just show Latest, select Next
-
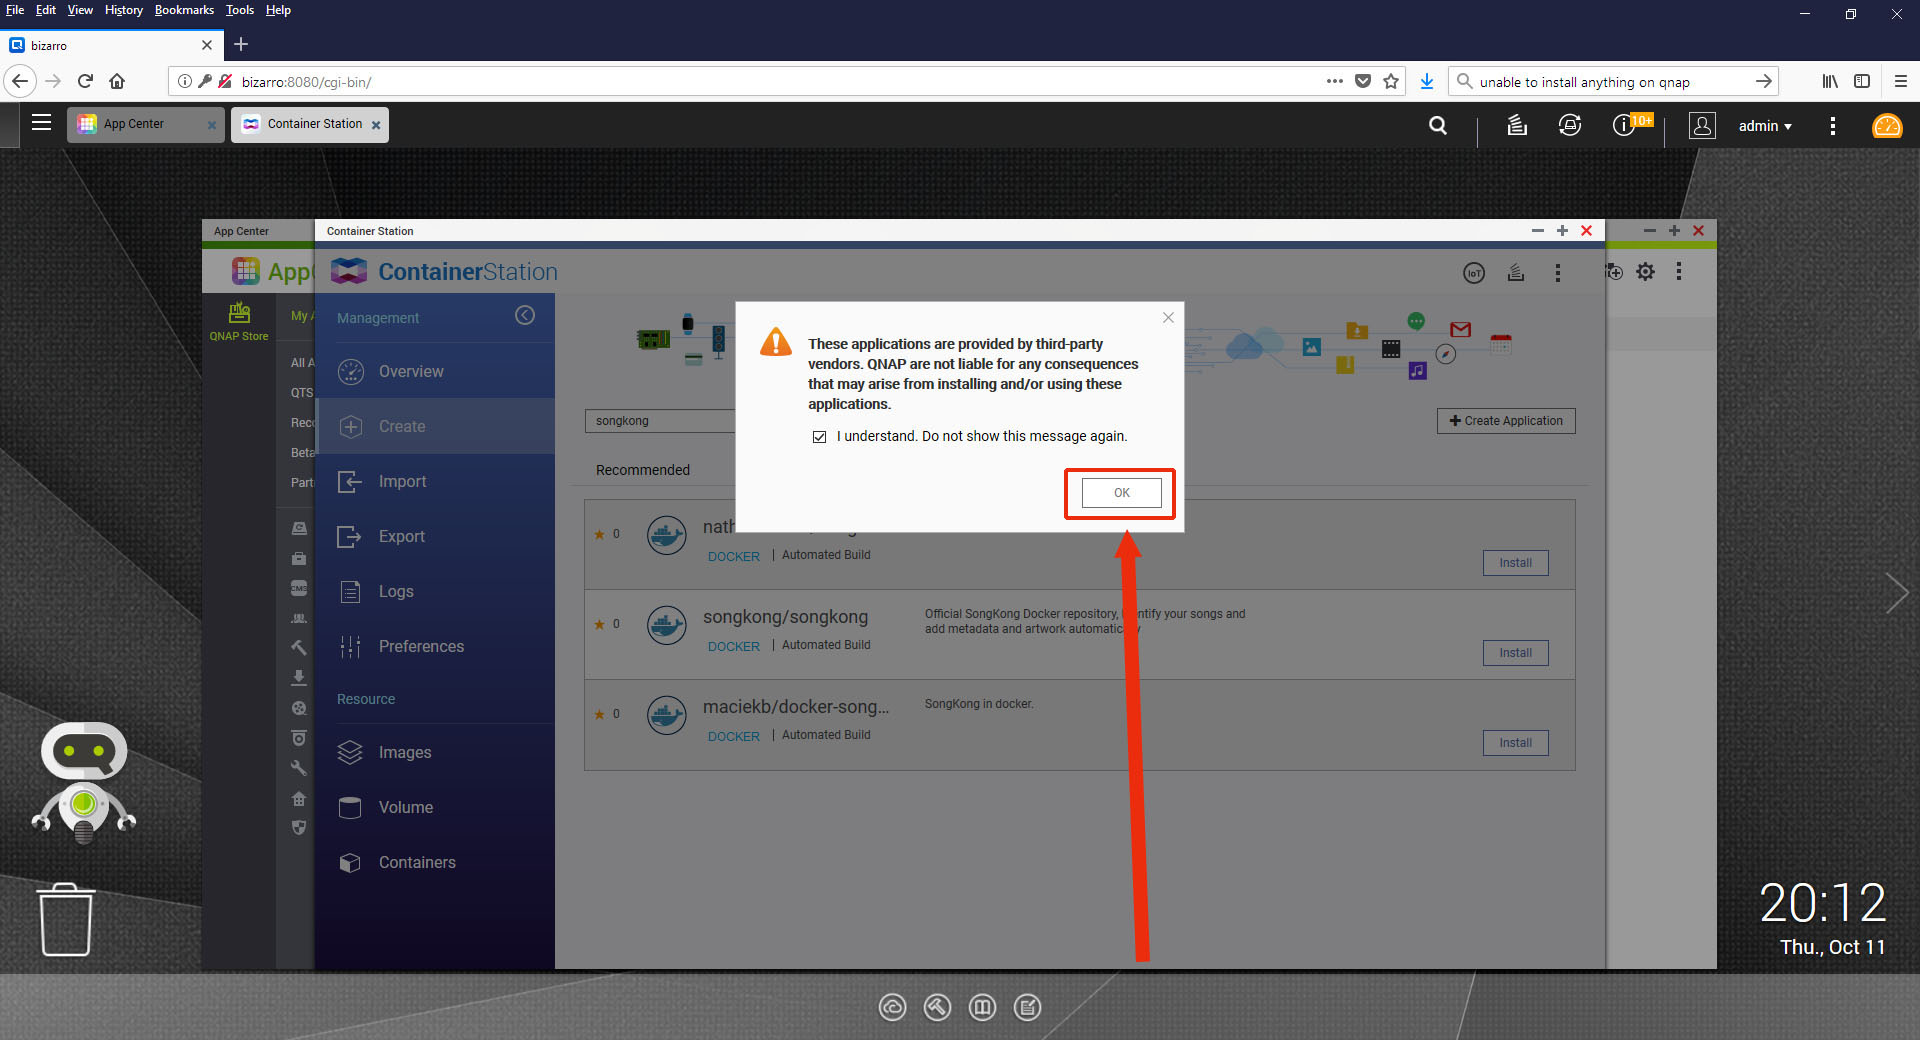
You may see a warning about third party apps, select Ok
-
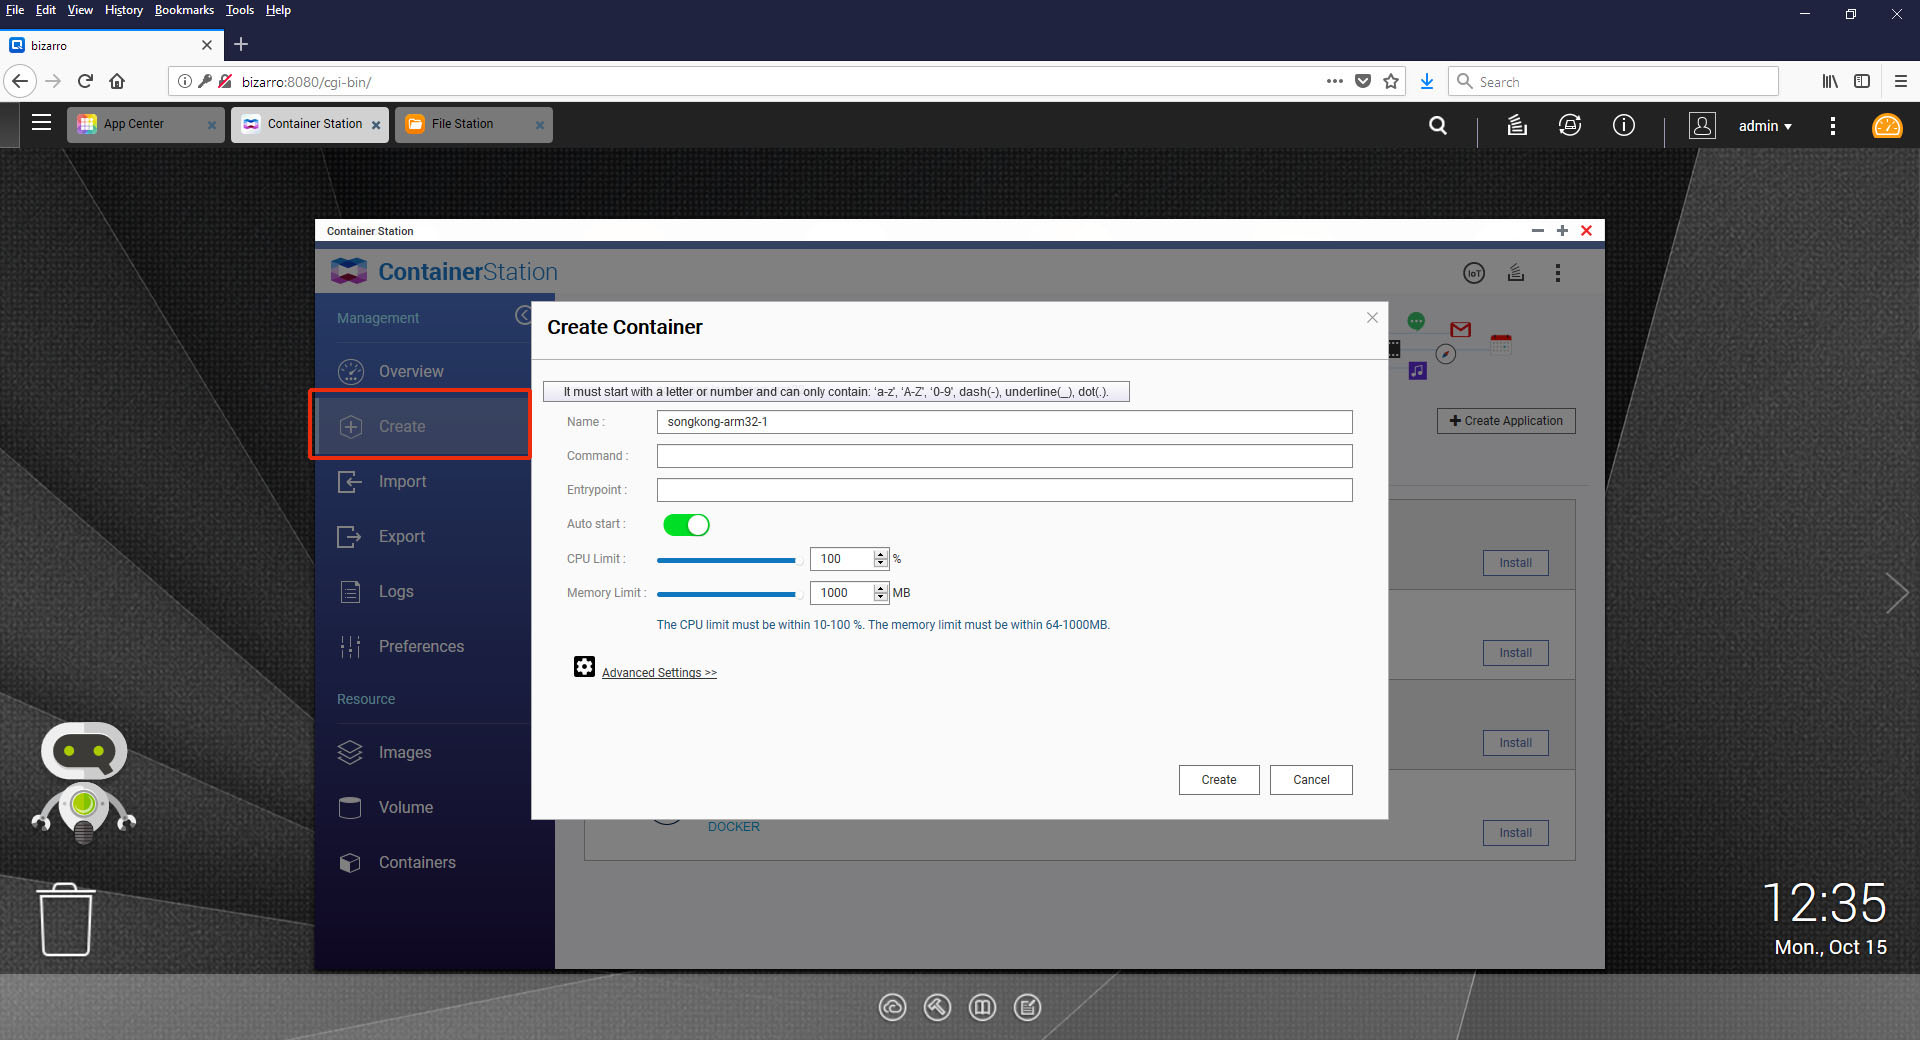
You will now see the Create Container window, select Advanced Settings
-
SongKong will be running inside its own virtual machine so by default cannot actually see any of your Music files within your QNAP unless you configure the location. Select Shared Folder from the left hand side
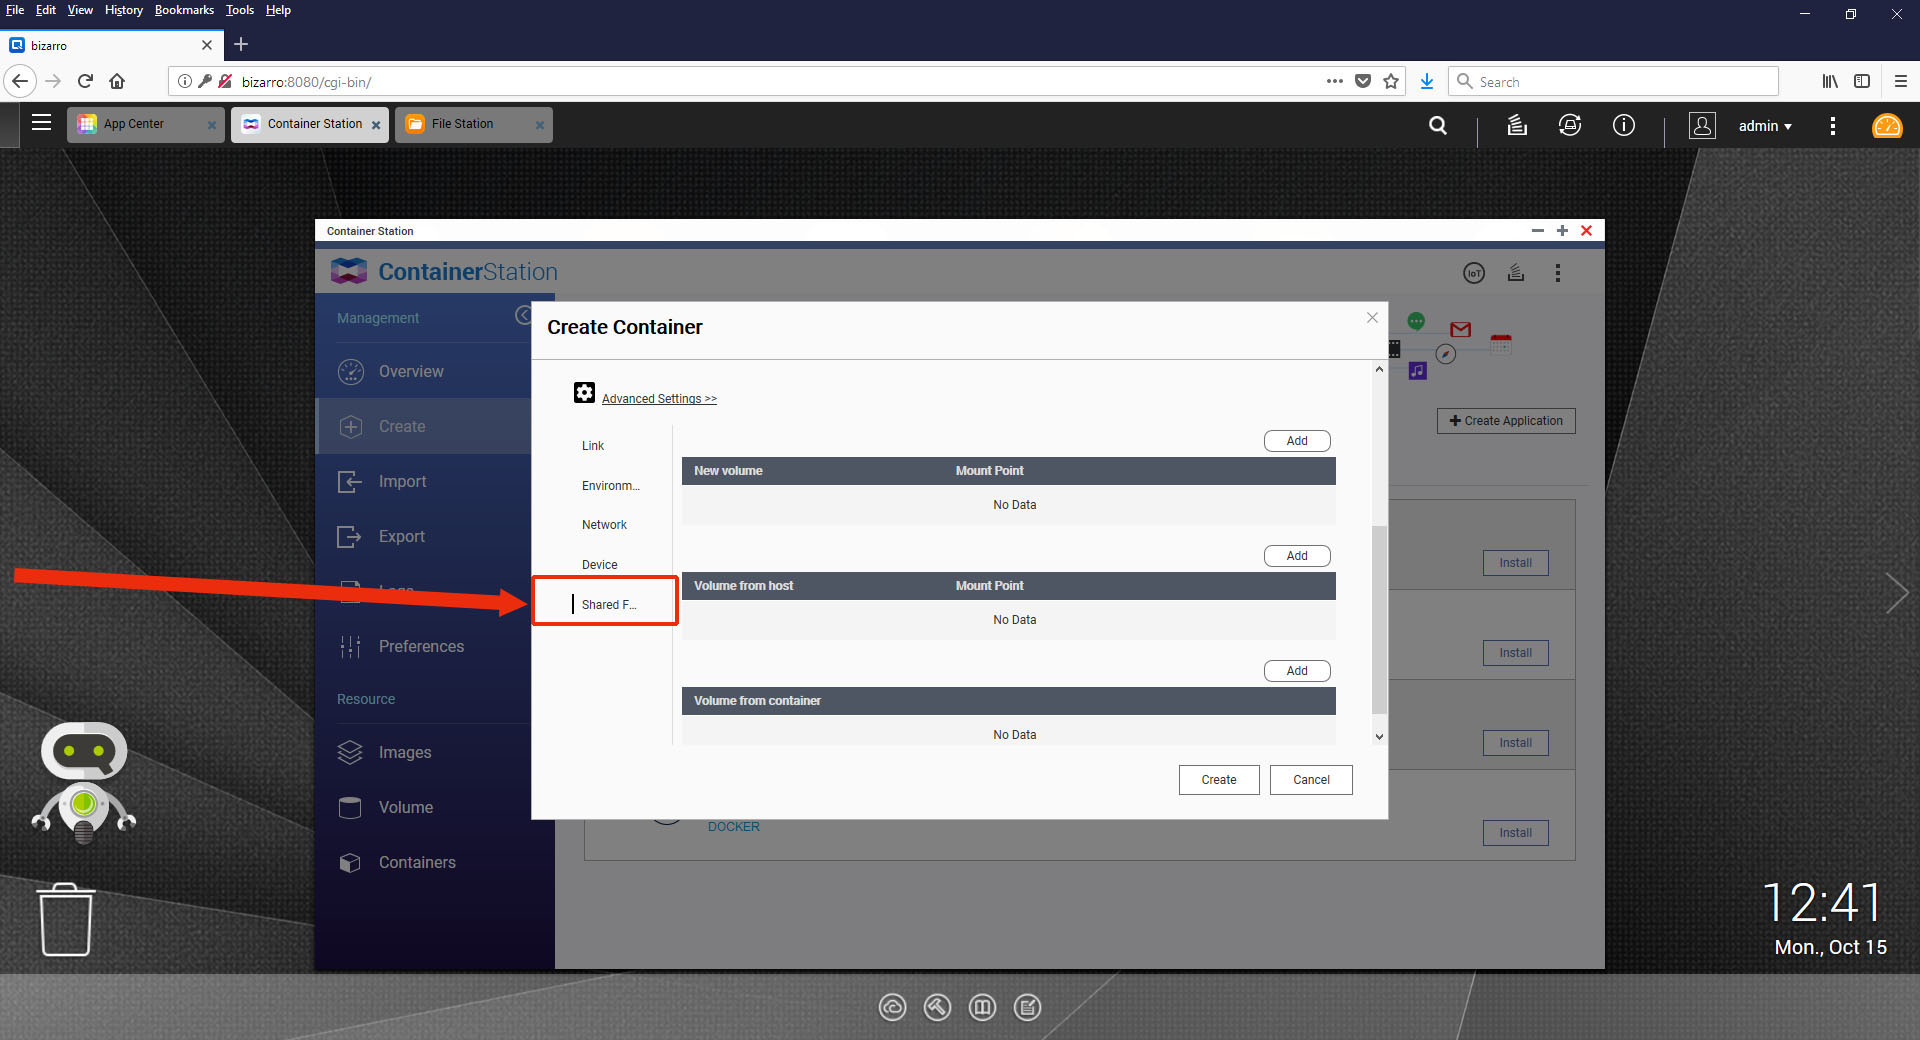
-
Now select the second Add button, this will create a line underneath the Volume from Host section
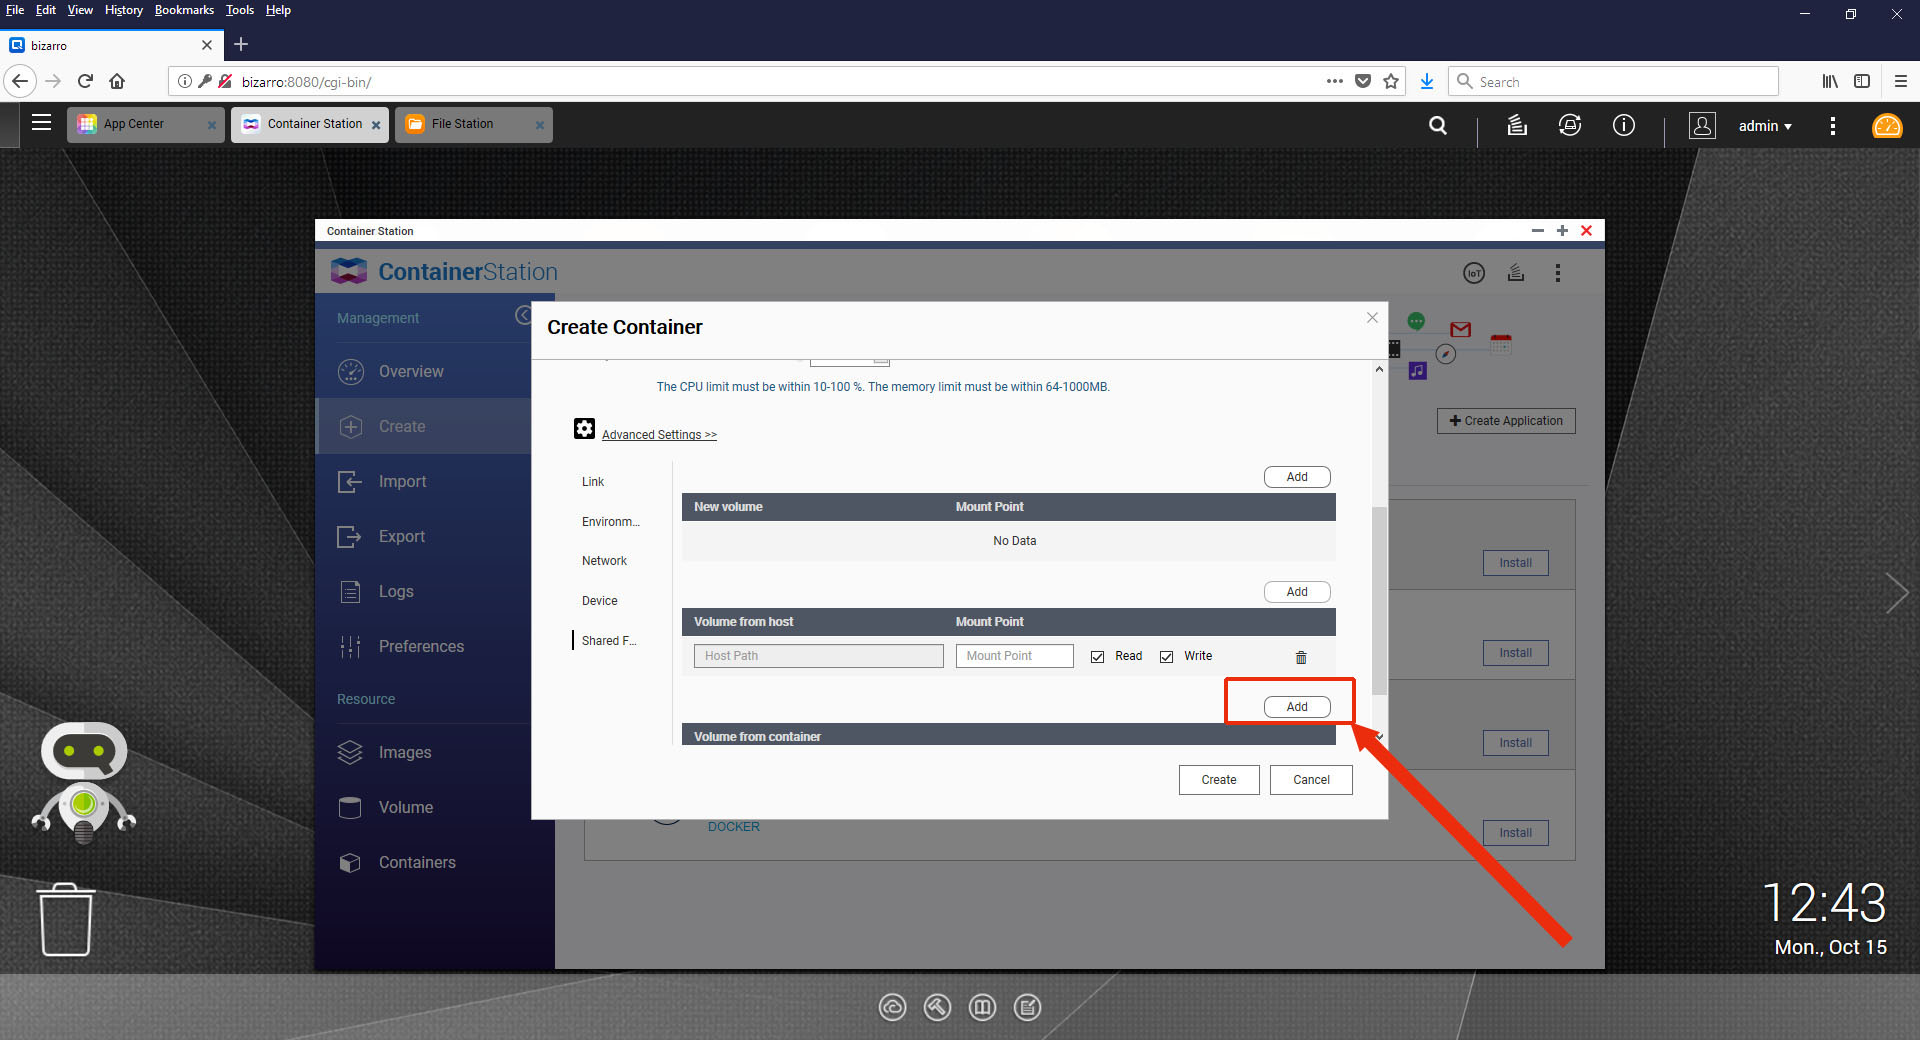
-
Now select the Host Path field and select your music folder. If you do not yet have a music folder on your Qnap you can switch to the File Station app and create your music folder there then come back to here and select it

-
The Mount Point field must be set to
/musicbecause this is a specially defined folder within the SongKong Docker app.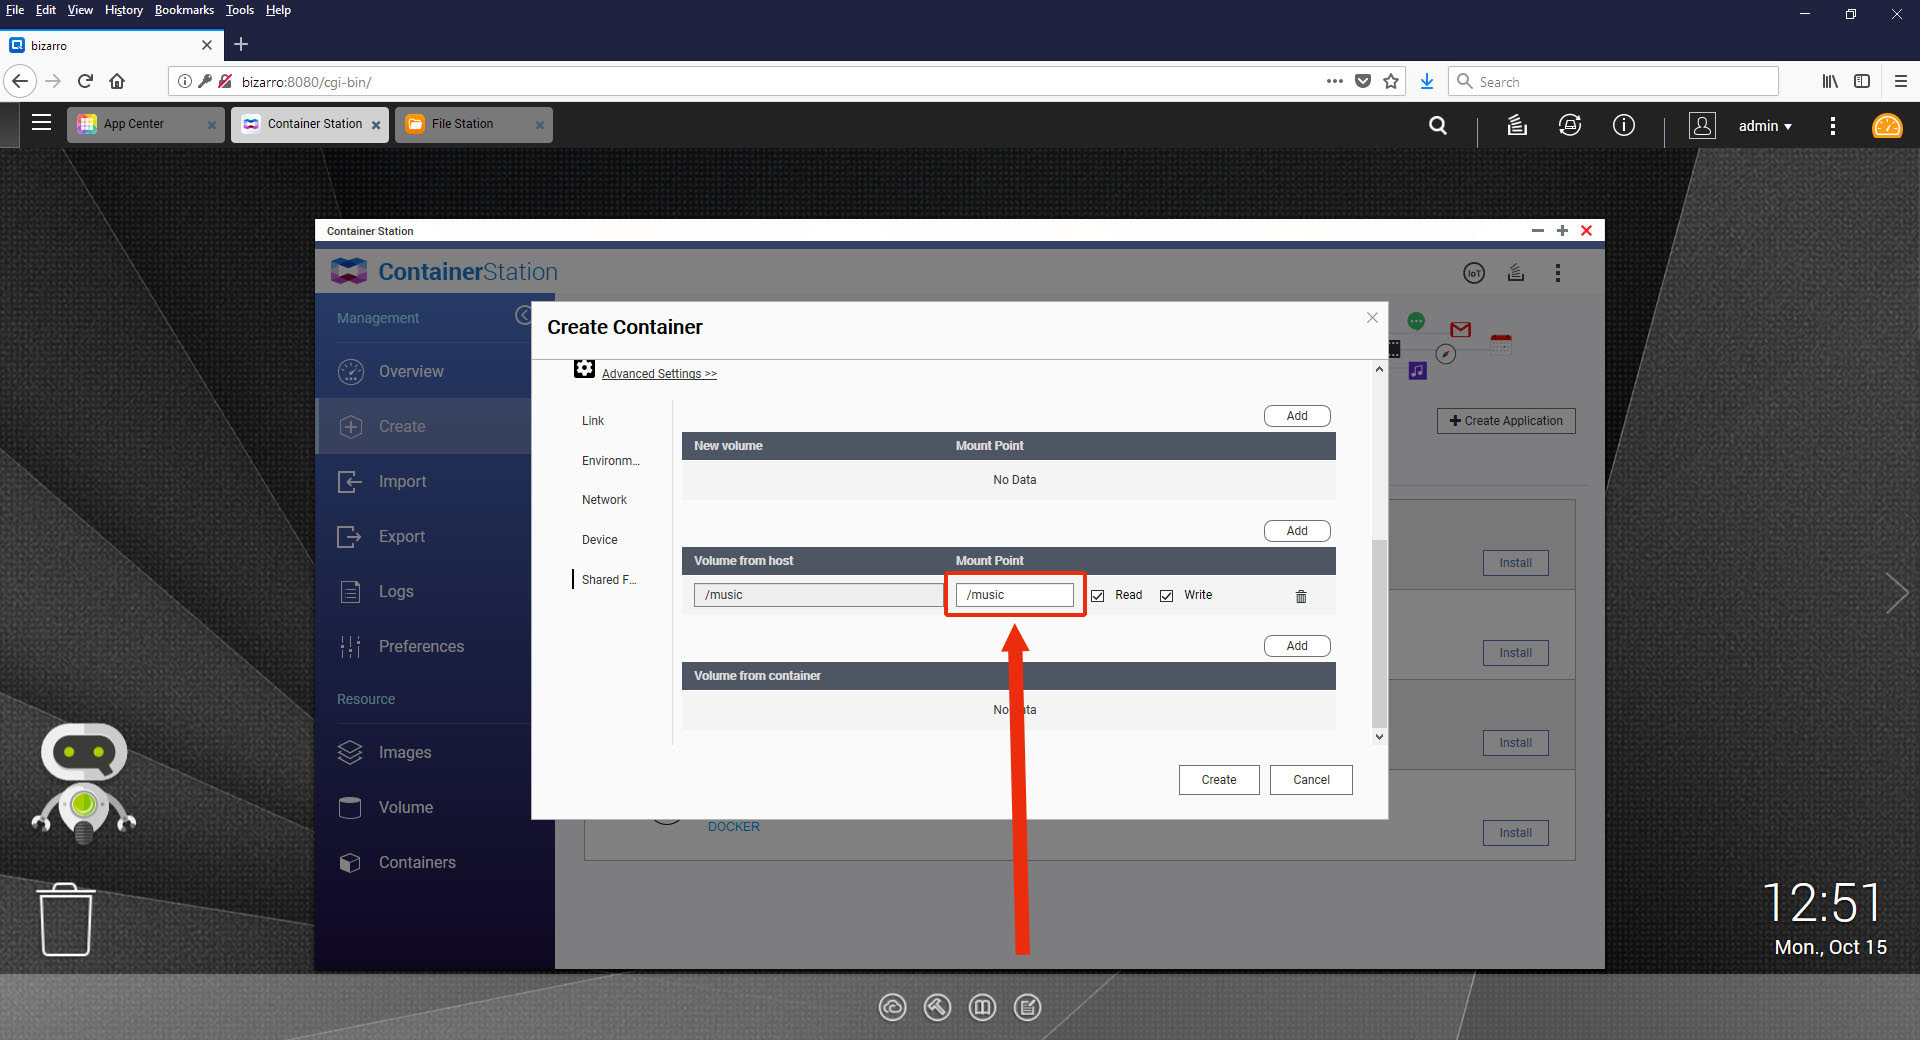
-
You can optionally also configure a mapping to SongKongs config folder, this gives access to SongKongs preferences, logs and reports from outside the Docker but is not strictly required since these are accessible from within SongKong application itself
Here we have created a new top level Shared folder called config, and then created a songkong folder within it, the mount path needs to be set
/songkong
-
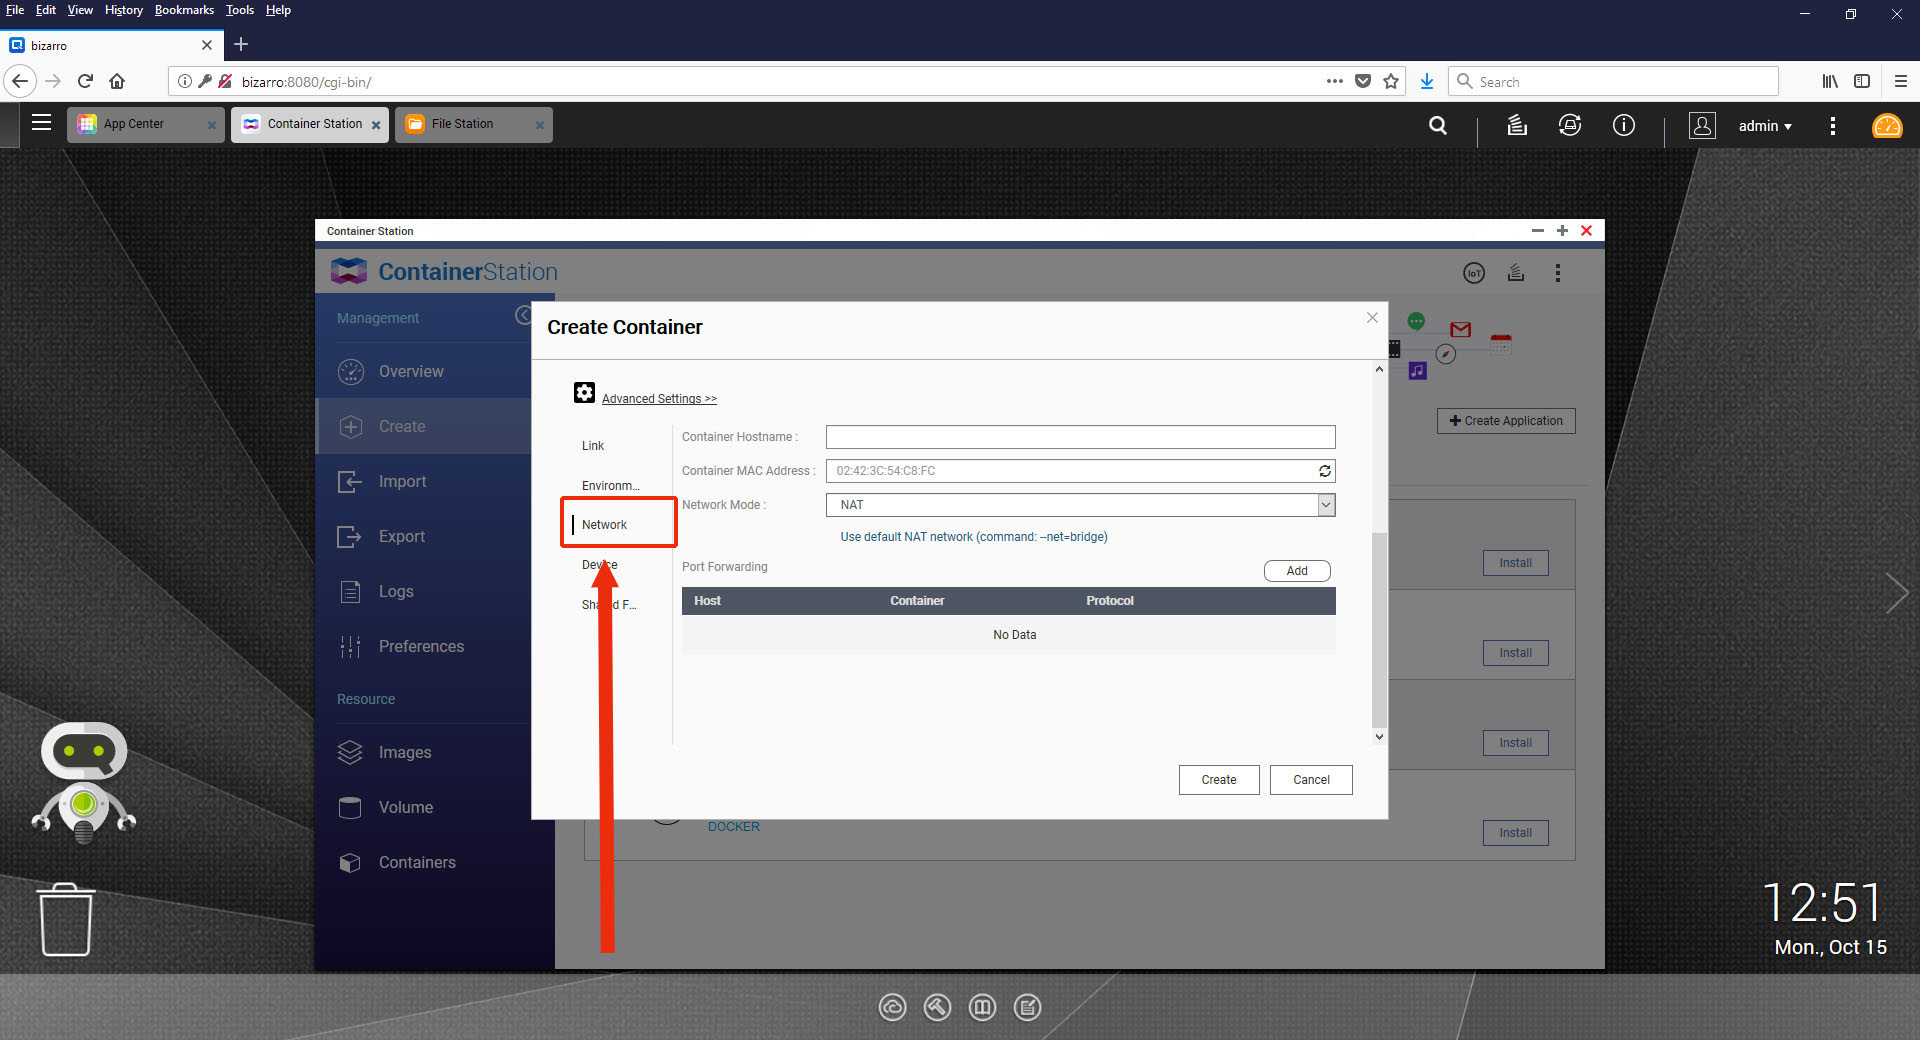
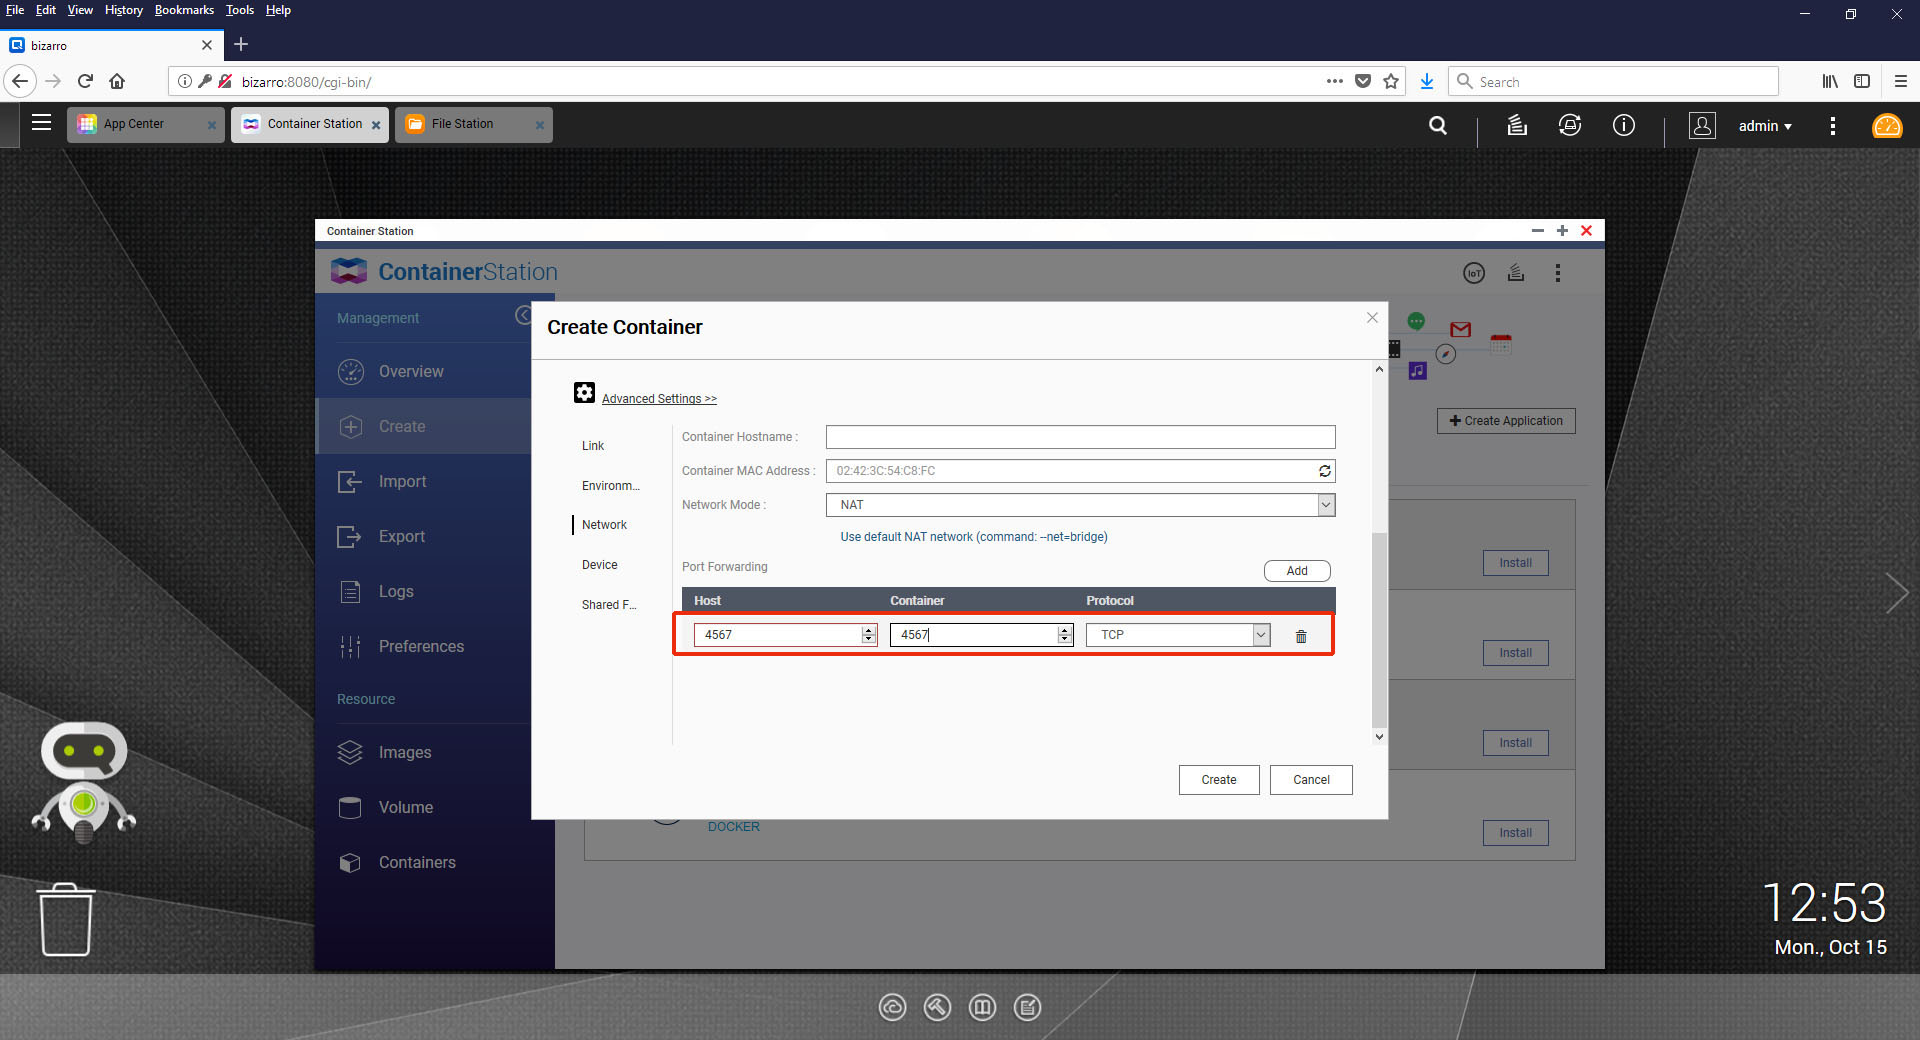
Now select the Network option from the left hand side
-
Select Add then enter 4567 into the Host and Container fields, this maps SongKongs standard port of 4567 so it is available on your network
-
Then select Create, this will download the Image and then start the SongKong image within a container
Wait a few minutes and then it should be listed under the Containers section
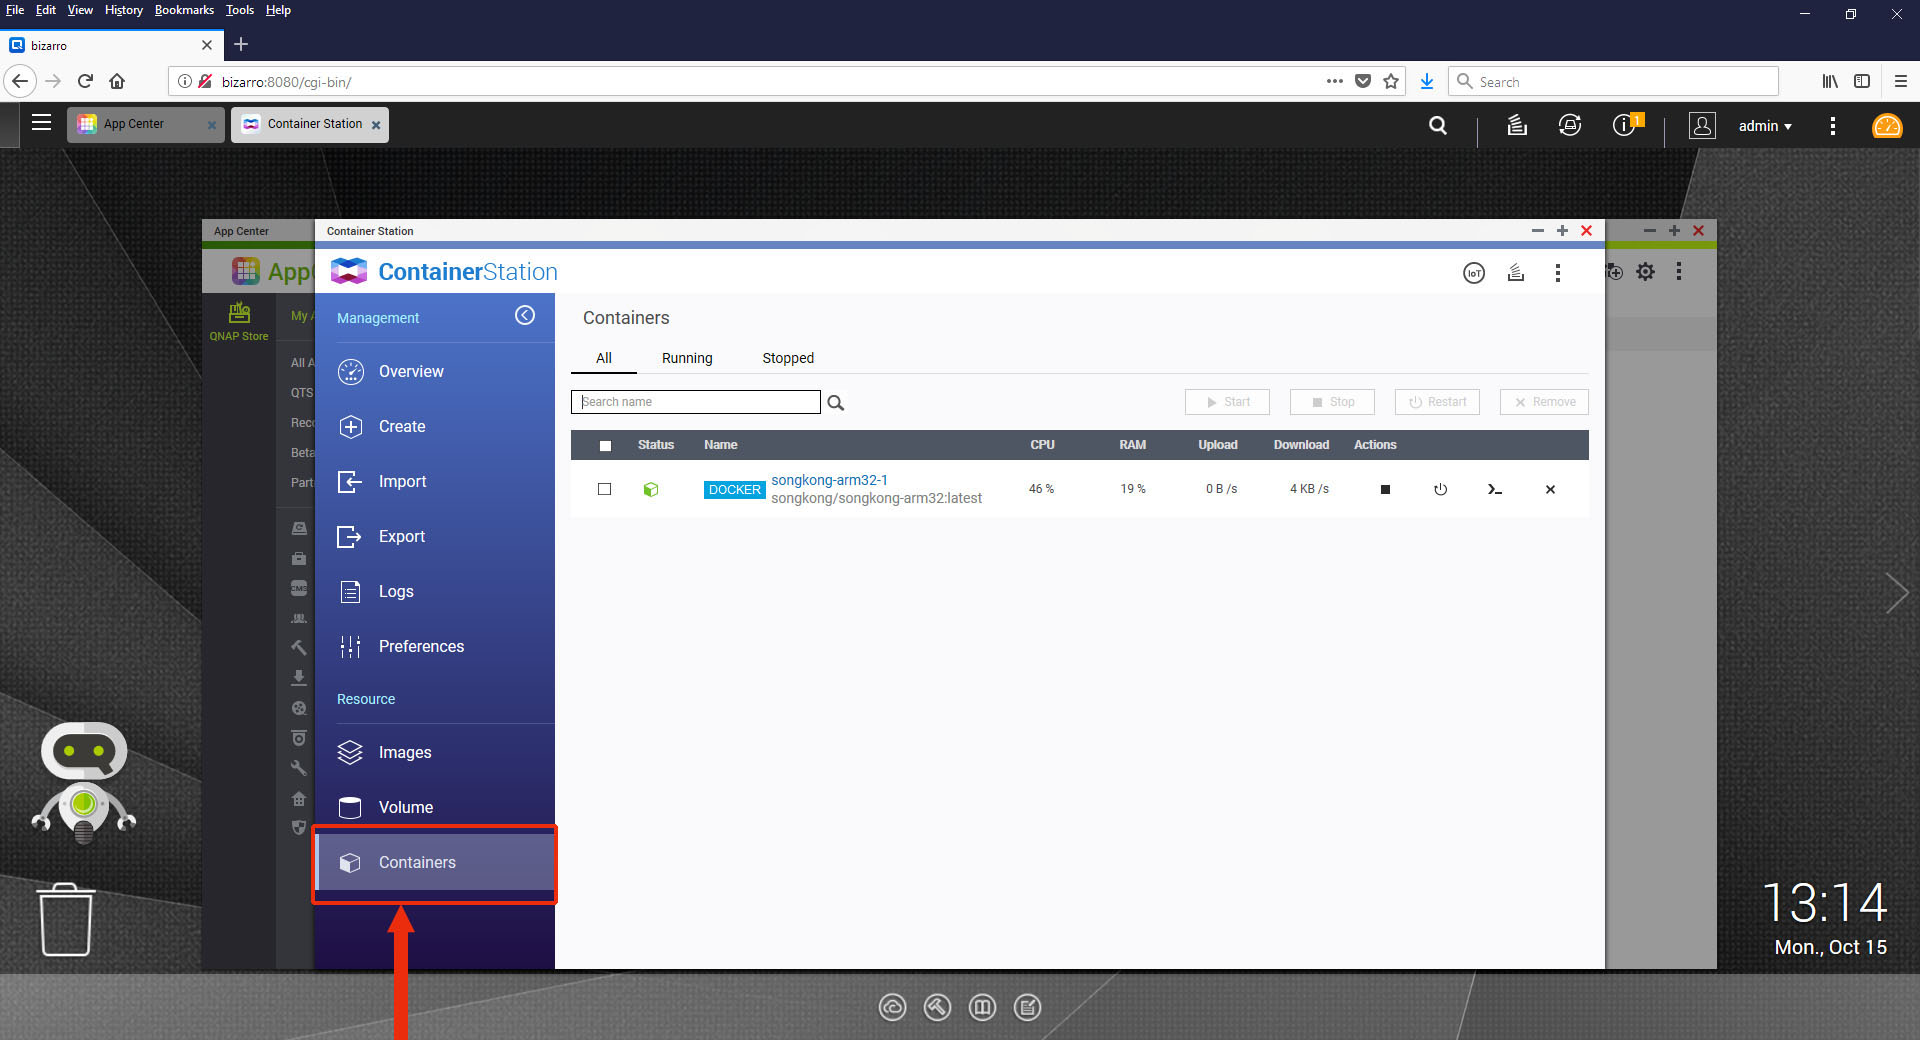
-
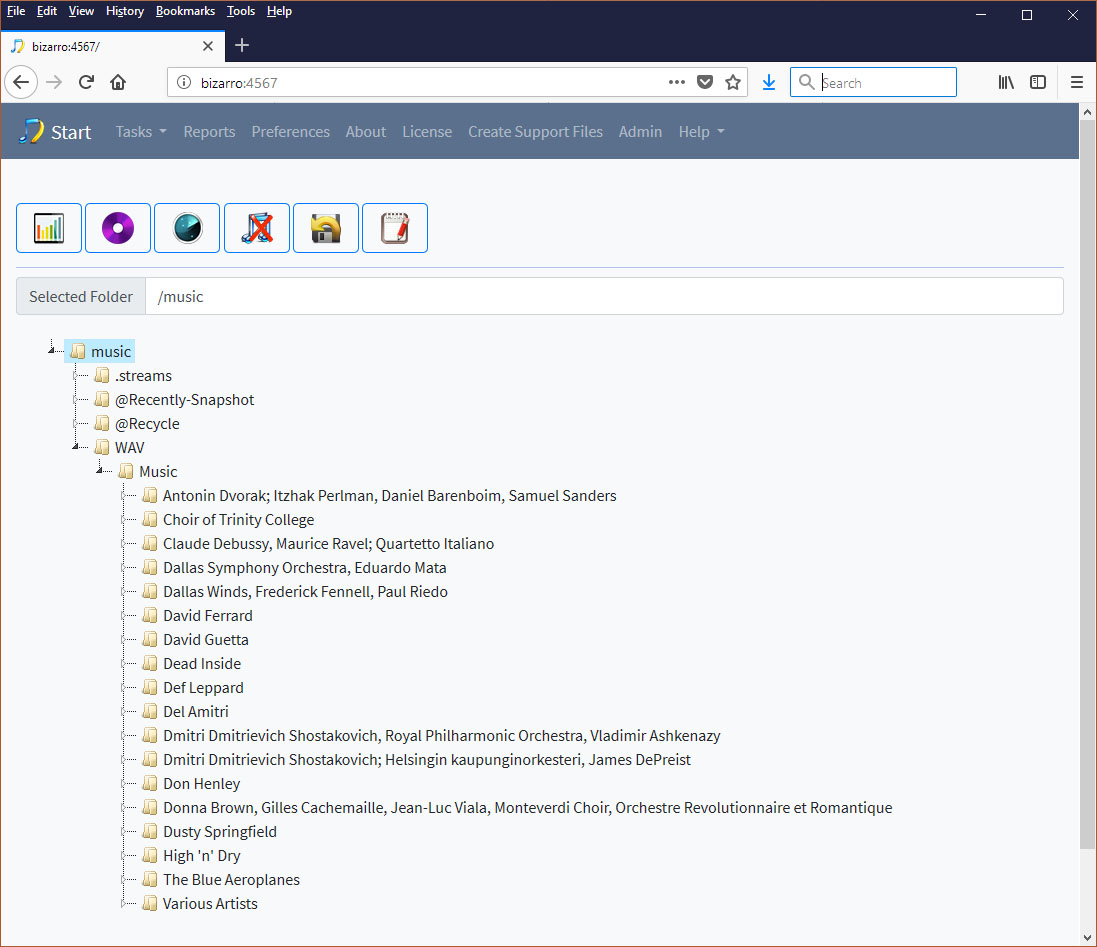
Wait 1 minute for SongKong to initilize then it should now be available on port 4567, this is the full version of SongKong, license can be installed by selecting the License menu item.
-
Because by default it is configured to Auto-Start SongKong should start automatically if your NAS is rebooted. But you can manually stop/start/delete a Container from the Containers section, or create a new container based on an image from the Images section.